Do you like to listen to the instrumentals of your favorite song? If you want to make the instrumentals of any particular song your caller tune, you can do so by removing vocals from it. Furthermore, you can use instrumental music while doing yoga to pay attention easily. So, to get your favorite instrumental music, you don’t have to search anywhere, as you can create it instantly by removing vocals from it.
By reading this extensive guide, you can learn how to separate vocals from music using the suggested tools. Thus, keep reading this guide to know the easiest way to remove vocals from a song.
In this article
Part 1: Reasons to remove vocals from music
There are plenty of reasons why people prefer to separate vocals from music. To learn about them, proceed to read the following section:
- Many people like to create karaoke versions of their favorite songs while sitting at home. For this, separating vocals from a song can be a great choice.
- If you want to add engaging background music to any of your videos for social media content, you can extract it from any song. To do so, you can use a professional tool to separate vocals from instrumentals.
- If you love to practice playing musical instruments, you can take help by listening to famous instrumental sounds. Thus, you can easily extract instrumental music from any audio clip using vocal remover.
Part 2: How to separate vocals from music with one click for quick use
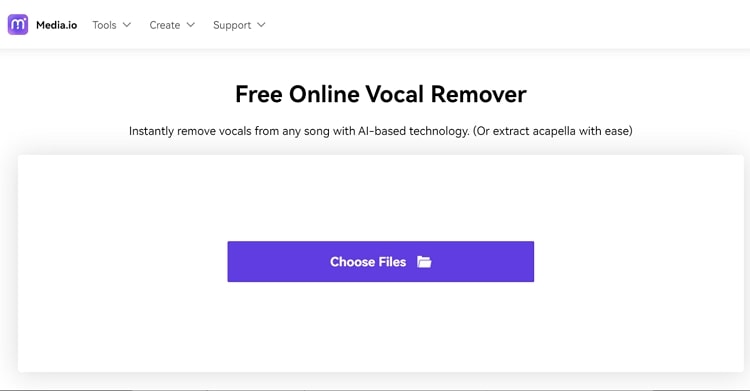
If you want an online and easy-to-access tool to remove vocals from a song, Media.io is one of the commonly used platforms. Many people use Media.io as a versatile video editor as it contains multiple editing features.
Apart from being a great video editor, you can also use Media.io as a reliable vocal remover. This vocal remover uses advanced technology to prevent users from putting in a manual effort. Hence, if you want to effectively separate vocals from music online, we will highly recommend you use Media.io.
Key features
- The vocal remover of Media.io uses artificial intelligence that can recognize vocals and instrumental music instantly. With this technology, the tool can instantly isolate vocals from the music effortlessly.
- On the vocal remover of Media.io, you can upload both video and audio files. The supported formats are MKV, MP4, MP3, M4A, OGG, etc.
- This tool provides a 100% guarantee to maintain high audio quality even after removing vocals from it. Thus, you can trust this platform as it ensures the high-end audio quality.
- The vocal remover of Media.io only requires one step to separate vocals from music. With a single tap, you can execute the whole process easier.
Steps to isolate vocals from a song using Media.io
To make your work easier, we have mentioned the detailed steps below through which you can isolate vocals from a song:
Step 1 Access the vocal remover tool
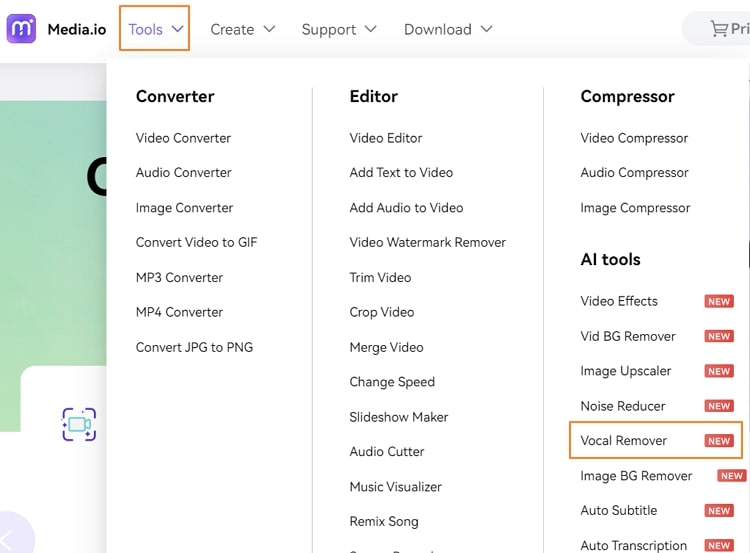
Begin by accessing the website of Media.io. Once done, select “AI Vocal Remover” from its tools. By doing so, it will open a new window instantly.
Step 2 Upload your media file
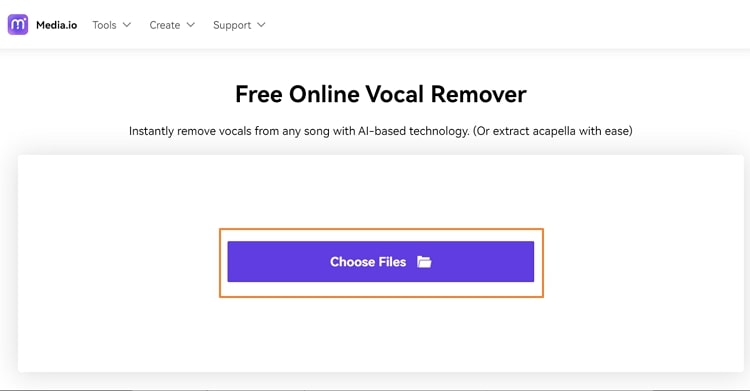
Now press the “Choose Files” button to proceed further. Afterward, browse the file from your PC and tap on the “Open” button. Once you have uploaded the desired file, the tool will automatically separate the vocals within seconds.
Step 3 Download your respective file
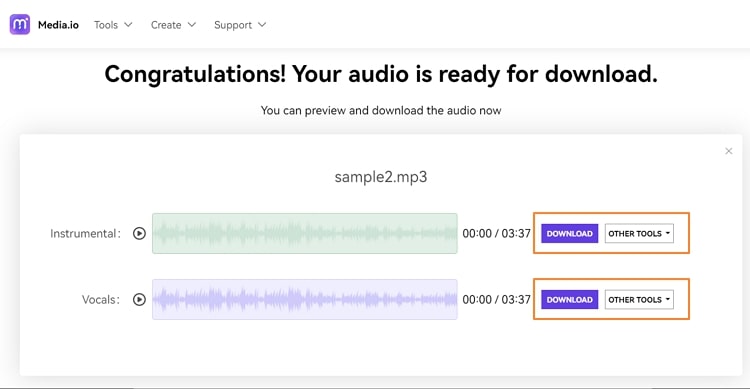
Once the isolation process gets done, you can click on the “Download” button displayed adjacent to the Instrumental and Vocal files.
Part 3: How to isolate vocals from music for a radio quality
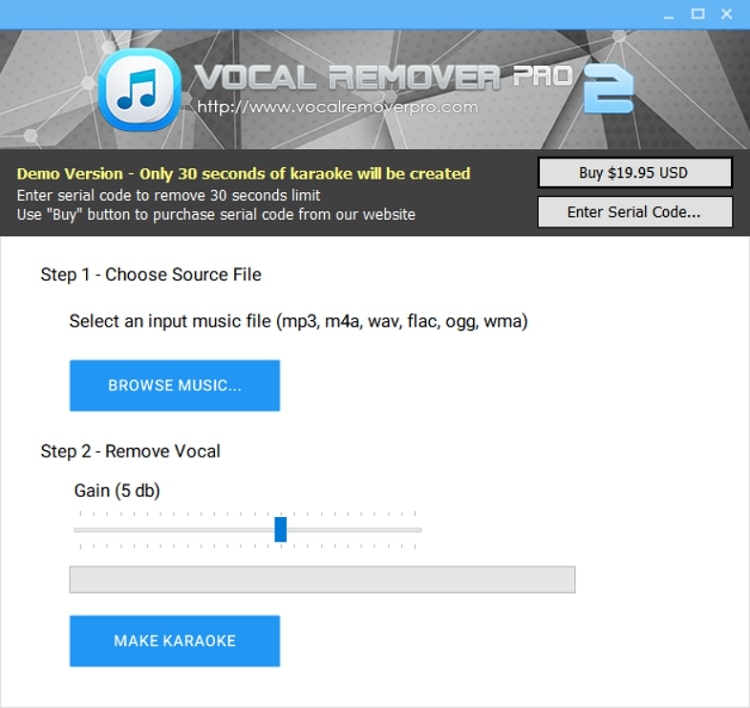
Many users may require a professional tool to extract music effectively. For instance, if you want to make a parody of any singer, you would need instrumental music of high quality. So, if you want a stable desktop tool for separating voice from music, you can try Vocal Remover Pro.
This platform is highly compatible with Windows operating system and functions efficiently. Moreover, it removes the vocals from any audio clip with great precision.
Key features
- This tool has an intuitive interface that allows beginners and non-technical people to isolate vocals from music easily.
- On this platform, you can upload unlimited audio files to remove vocals from them. Hence, this tool does not impose any restrictions on the user.
- Before removing vocals from your audio file, you can also adjust the decibel value of the audio.
- This tool is capable of removing vocals from a song within 5 seconds.
Steps to remove vocals from music using Vocal Remover Pro
To use Vocal Remover Pro for separating voice from music, you can read the following steps:
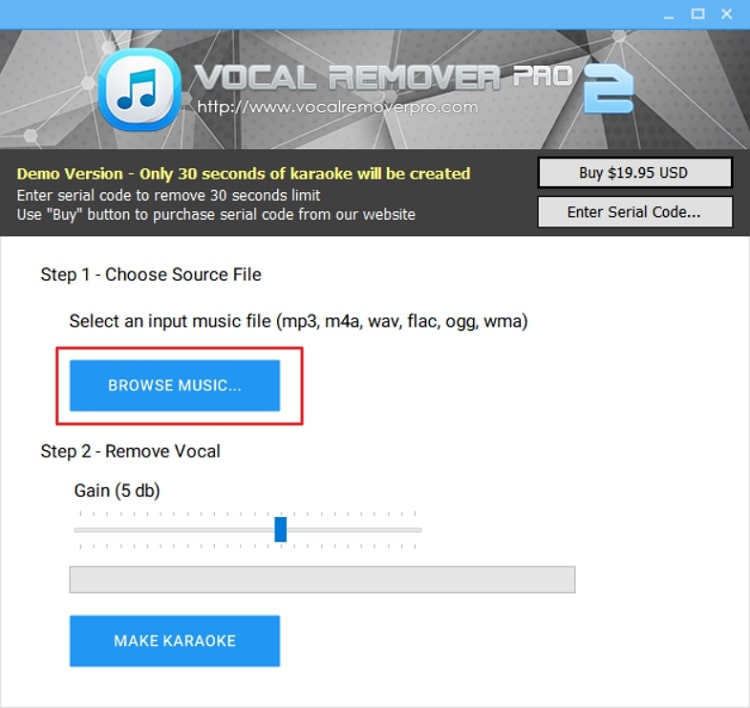
Step 1 First, launch Vocal Remover Pro on your PC.
After its successful installation, you can see its main interface. From there, click on the “Browse Music” option to upload the desired audio file.
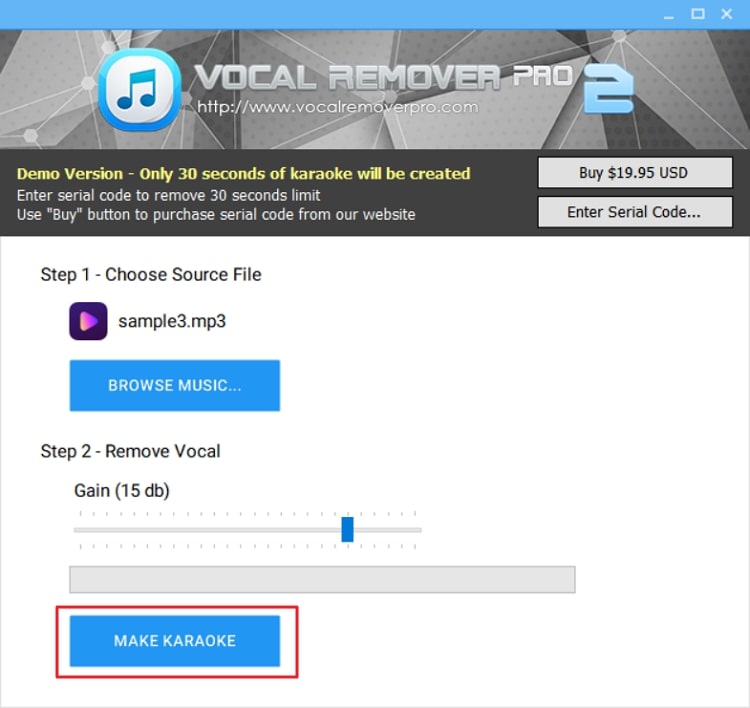
Step 2 After uploading the media file, adjust the value of decibels from the slider.
Once done, hit the button “Make Karaoke” to isolate vocals from your audio clip.
Part 4: How to remove music but keep vocals
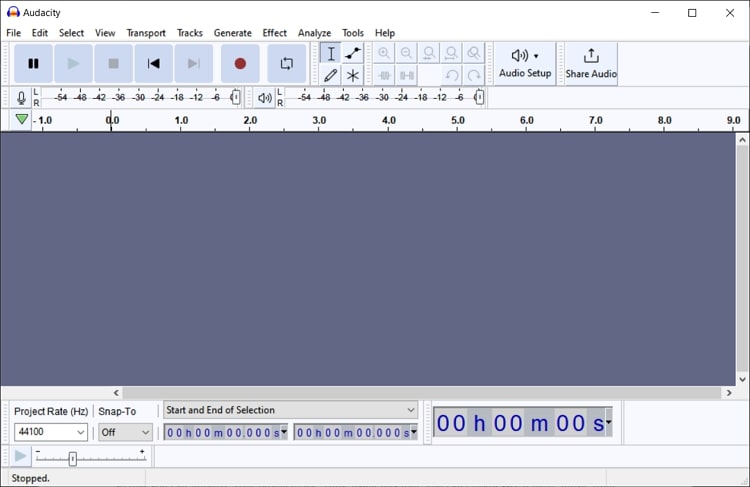
Whenever you intend to jot down the lyrics of a song, you will always prefer having the song file but only with vocals. While it makes it easier for you to understand the lyrics of a song, the ideal tool for this purpose is Audacity which offers various kinds of editing features.
Using this tool, you can easily apply tons of sound effects to your video clip for further enhancements. Moreover, it also supports multitrack audio and batch processing so that you can improve your productivity. Thus, using this tool, you can effortlessly remove music from an audio clip or song while keeping the vocals.
Steps to remove but keep vocals using Audacity
If you want to remove music but keep the vocals, then you can navigate to the following steps:
Step 1 Start by downloading and installing Audacity on your PC or MacBook.
Open its main interface and upload your desired audio clip on its timeline by accessing the “Open” option from the “File” tab.
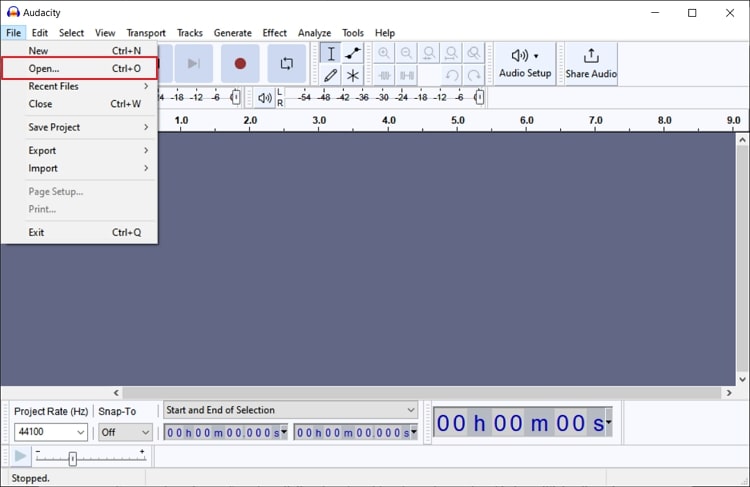
Step 2 Afterward, select the area from where you want to extract music.
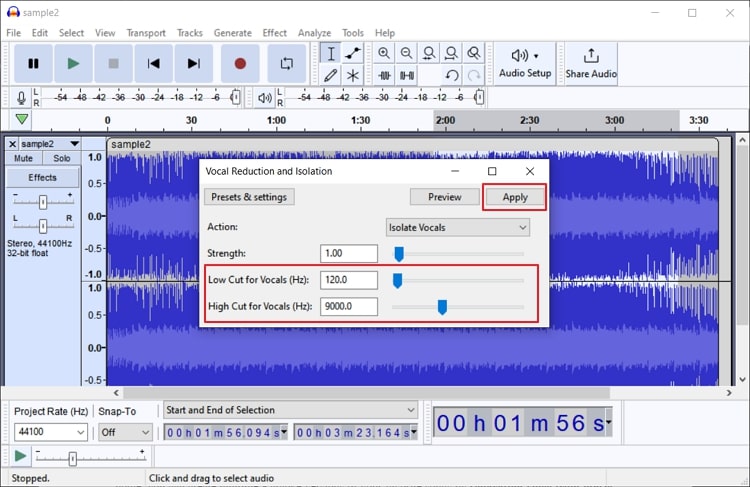
Once done, go to the Effects tab and select the special effect called Voice Reduction and Isolation. It will open a small menu from which you can choose “Isolate Vocals” from the “Action” tab. Now increase the value of “Strength” to add more modifications.
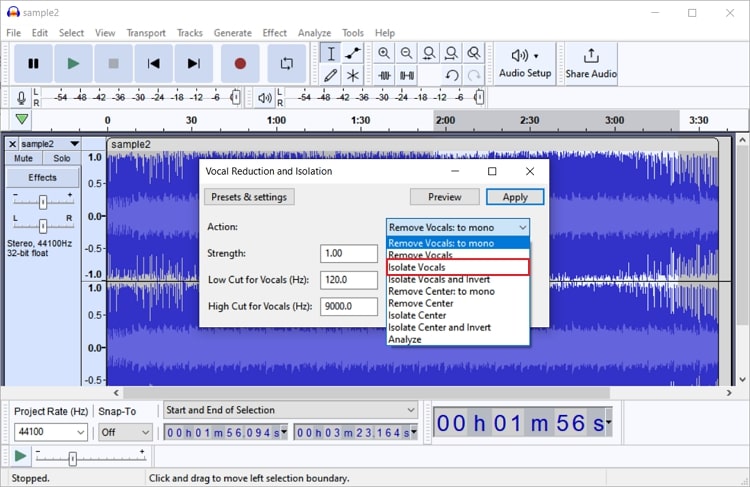
Step 3 By staying at the same menu, you can also alter “Low Cut for Vocals” and “High Cut for Vocals” to remove music.
You can click on the “Preview” button to see the results and “Apply” to apply the effect. In the end, you can adjust the “Amplify” effect to make the final result perfect.
