When recording a video, you mostly want to avoid camera shakes and other unwanted movements. But the noise in a video can also be incredibly distracting and frustrating for viewers. It can ruin otherwise perfect footage and make it difficult to understand what’s happening.
If you're having trouble with noise in your video, there are a few options you can do to try and fix it. One option is to use a video editing program, such as Final Cut Pro. Read on to learn about how to use Final Cut Pro noise reduction.
In this article
Part 1: A Brief Overview of Final Cut Pro
There are so many different software programs for video editing. One of the most popular ones is Final Cut Pro by Apple. It is a powerful video editing program that you can use to create professional-quality videos. The software has been used to create Hollywood blockbusters and independent films alike.
OS Compatibility: macOS 10.13. 6 or later
Cost: $299.99
Final Cut Pro has a sleek and modern design that is packed with some key features that professional editors will love, including:
- Final Cut Noise Reduction
- Multi-cam video editing
- Advanced color correction
- Built-in effects and plugins to further customize your videos
Part 2: How To Reduce Video Noise in Final Cut Pro
If you're working with footage that has a lot of noise, you may want to reduce the noise in your video. You can do it with the help of an audio plugin called Noise Reduction on Final Cut Pro (FCPX). By using this plugin, you can also improve the overall quality of your footage.
Now, follow this step-by-step tutorial on how to reduce noise using Final Cut Pro:
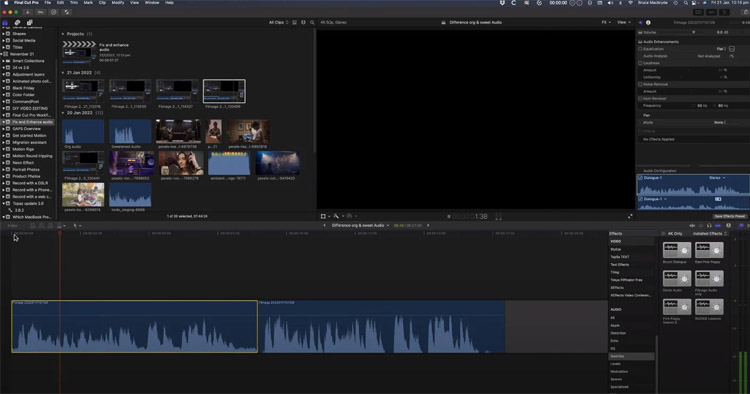
Step 1 Upload your video file to Final Cut Pro.
After you select and import your video file, you can drag it to the video track on the timeline.
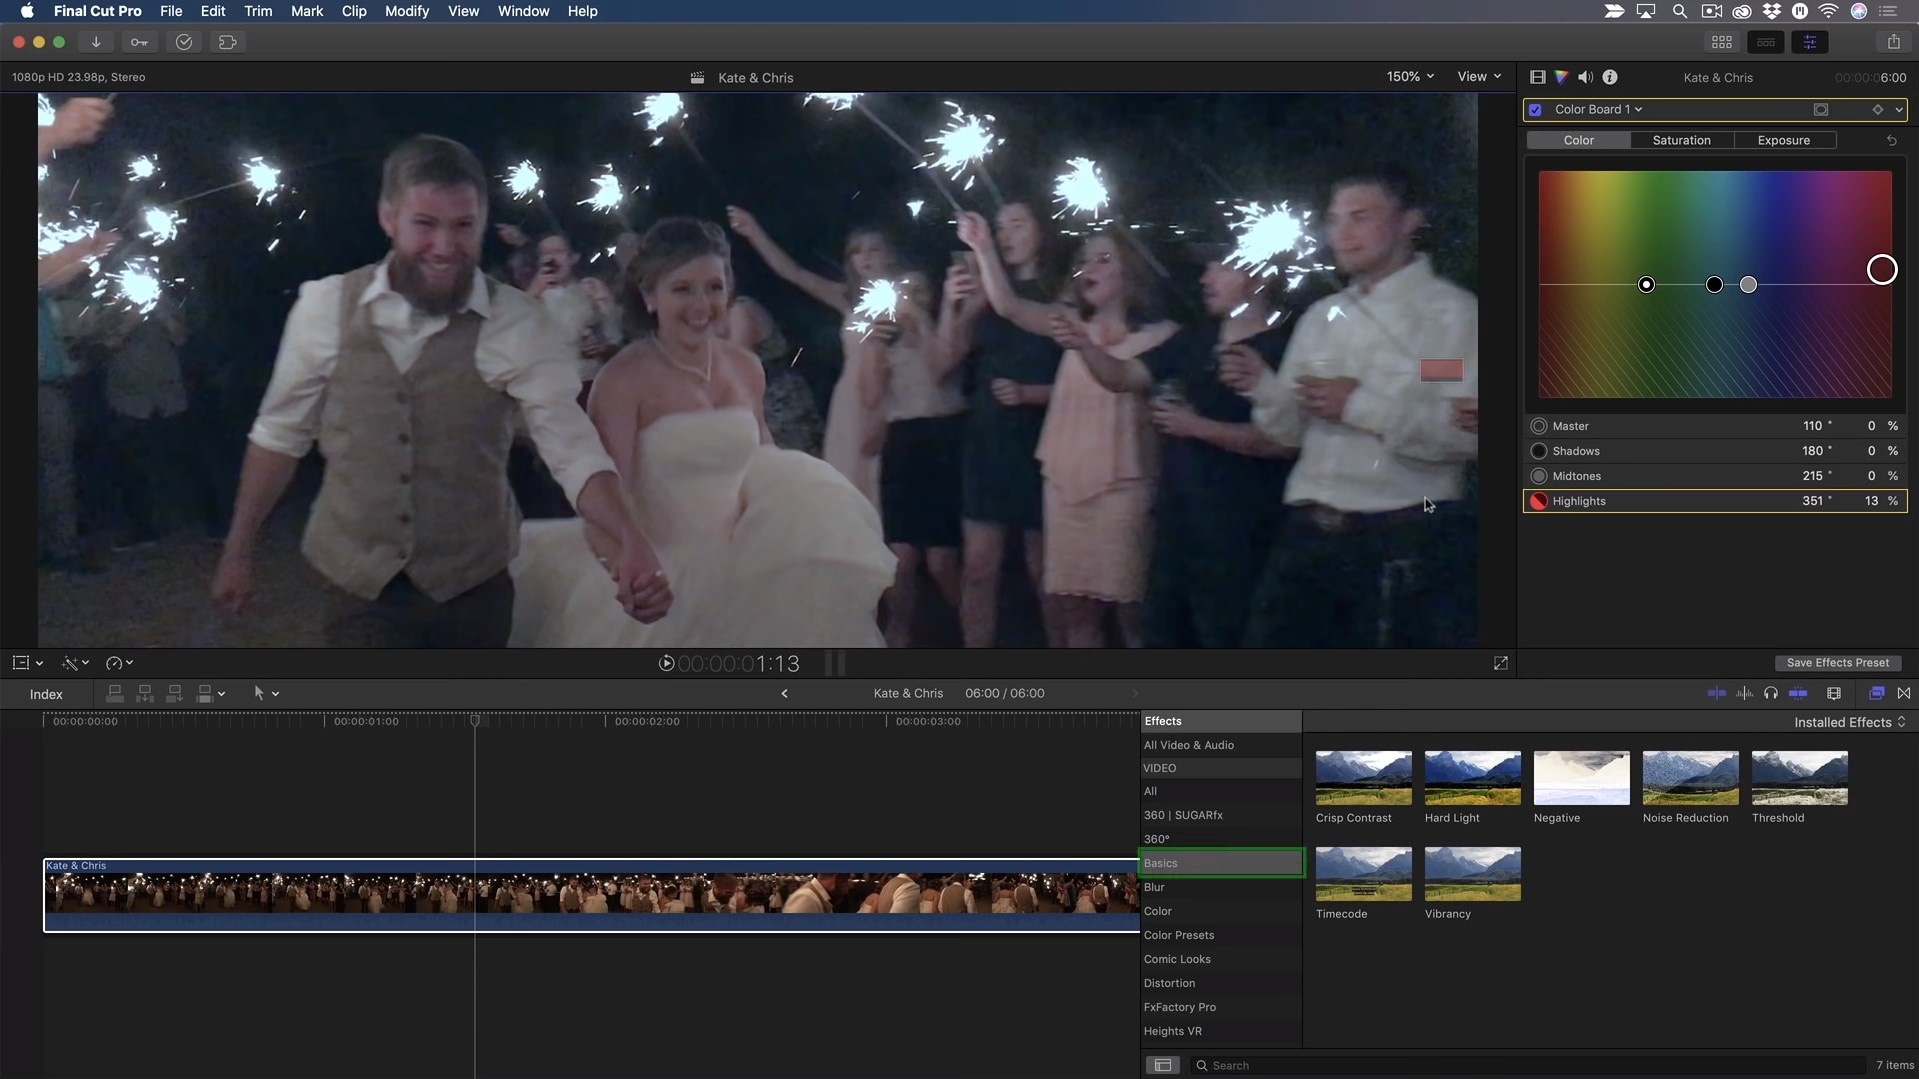
Step 2 Apply the Noise Reduction effect.
Click the video track on the timeline, then go to Effect > Basic > double-click Noise Reduction. Then, wait until the program has finished analyzing your video noise.
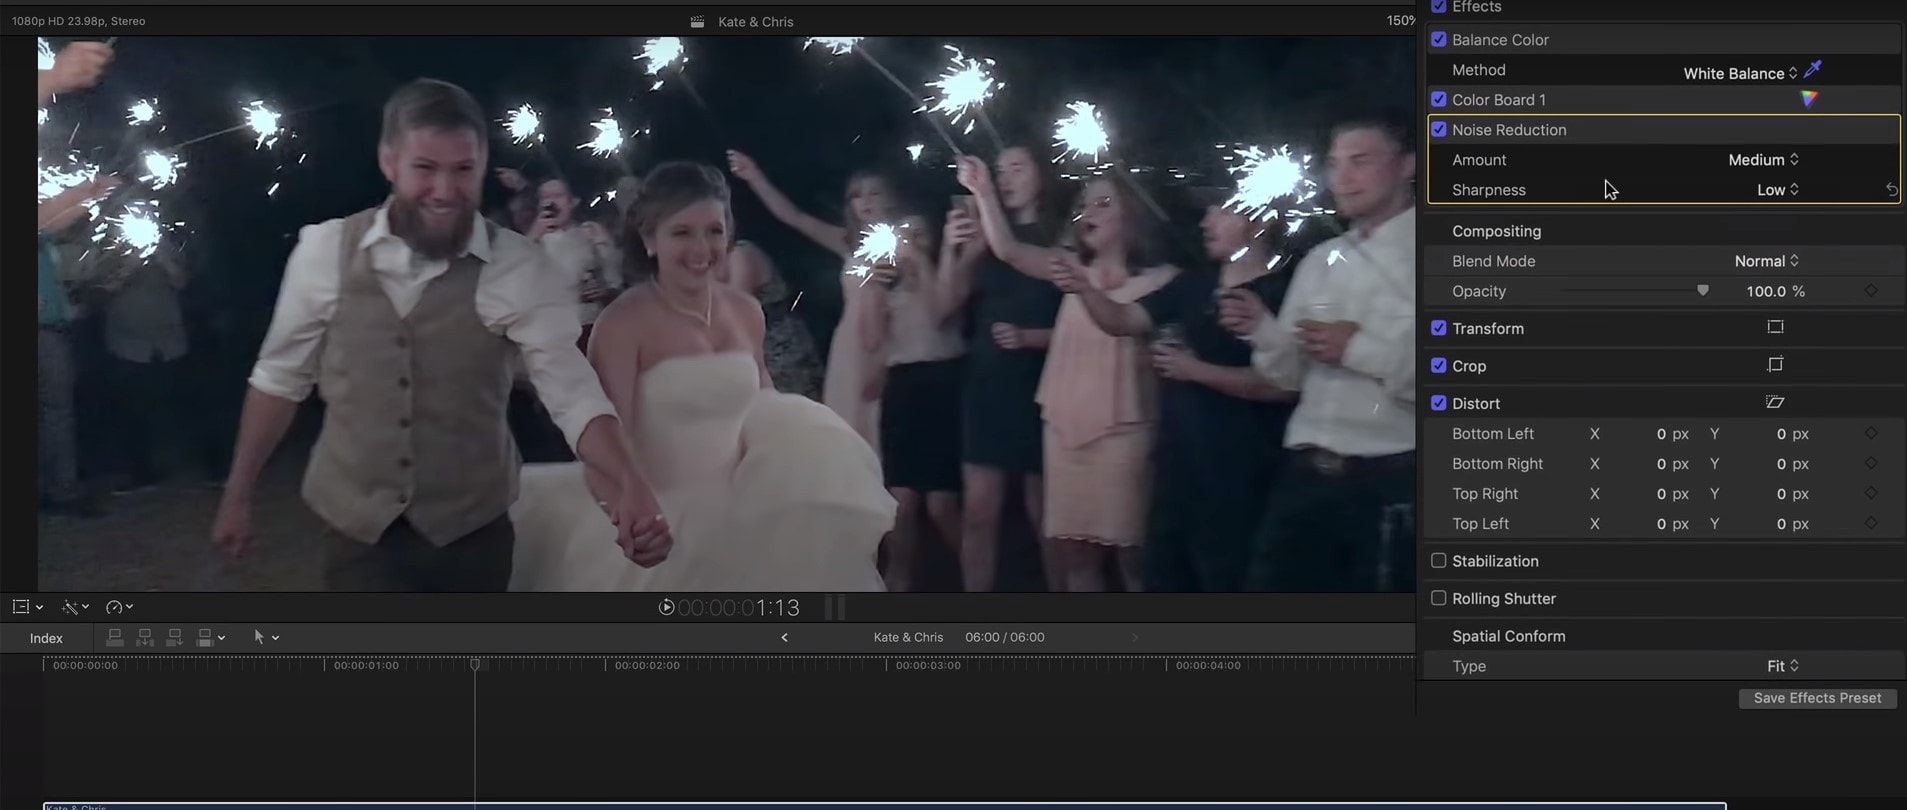
Step 3 Change the Noise Reduction setting.
You will see the noise reduction controls, which include the amount and sharpness. Adjust the setting based on your needs. You can always play the preview to see how the result looks.
Part 3: What’s the Best Alternative for Final Cut Pro and How To Use It
If you encounter difficulty in reducing noise in FCPX, you are not alone. It can be challenging for people who have little experience with video editing. Moreover, it can be pretty expensive. If you’re on a budget, you may want to look into alternatives.
Media.io is one of the few that can effectively reduce noise in your video footage, just like Final Cut Pro. Its noise removal feature is top-notch, and it’s a prominent alternative to the noise reduction feature in Final Cut Pro.
Official website: https://noisereducer.media.io/.

Media.io is a newer program than Final Cut Pro and therefore has a more modern interface and design. It is also more affordable than Final Cut Pro and offers a range of features that are on par with what you would expect from a professional video editing program.
In addition, Media.io is easier to use than Final Cut Pro since it uses AI technology, making it a good choice for those who are new to video editing or who want a more user-friendly program.
How to use the Media.io Noise Reducer tool:
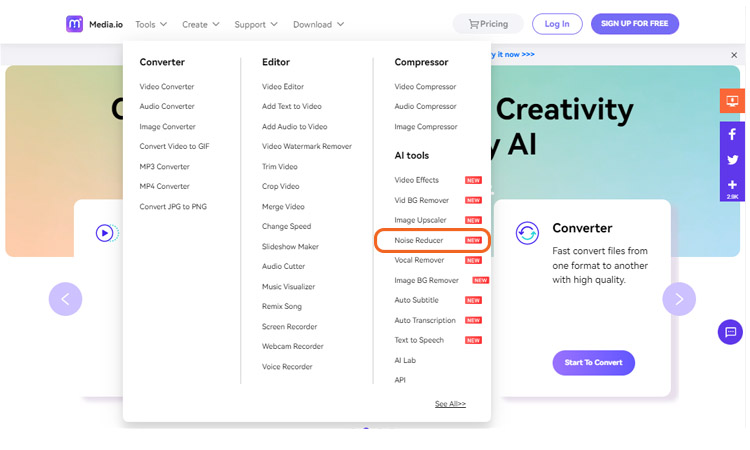
Step 1 Open the Noise Reducer tool on Media.io.
At the Media.io website, click Tool > Noise Reducer.
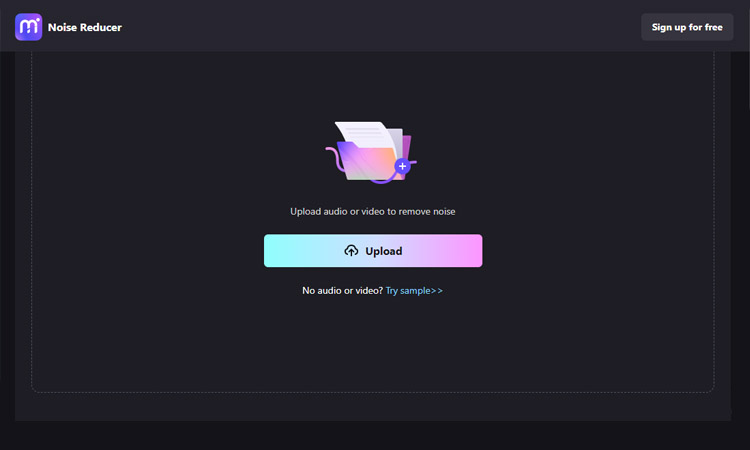
Step 2 Add the video file you want to remove the noise.
Click the Upload button to import the file and select the video you want to use.
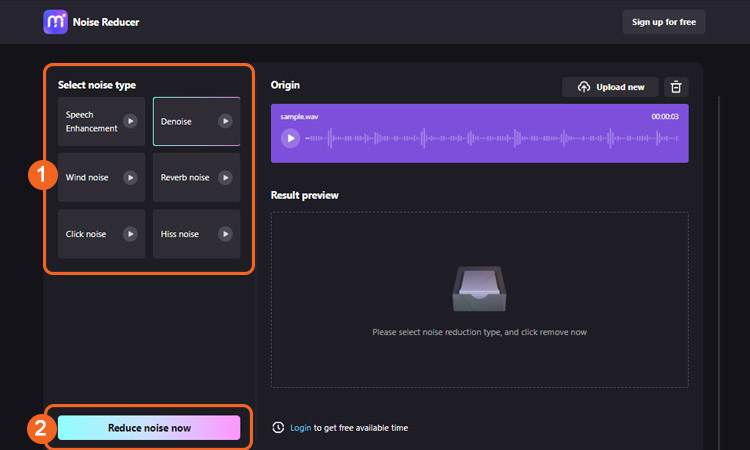
Step 3 Choose the noise type to reduce.
Media.io offers various noise-removal options. Simply select the type of noise you want to remove, then click ‘Reduce Noise Now.’ The program will analyze your file and automatically remove the selected noise from the audio.
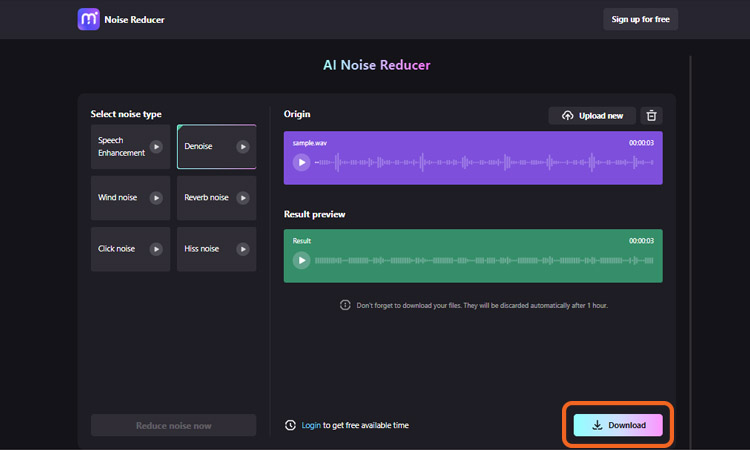
Step 4 Download the result.
You can listen to the result preview first to see whether you are satisfied or not. After everything looks fine, you can start downloading it by clicking Download.
FAQs
1. What’s the best noise remover for PC?
If you're looking for a reliable and straightforward noise remover for your PC, UniConverter is the best option on the market. From recorded audio to live streams, UniConverter can remove the background noise with just a few clicks.
Plus, UniConverter is also a great video converter and online video downloader. So if you need to convert or download videos for work or pleasure, UniConverter is the all-in-one tool you need.
2. Should I denoise before or after color correction?
It is difficult to answer this definitively as it depends on the specific project you are working on and the look you are trying to achieve. However, based on a general rule of thumb, it is usually best to denoise footage before color-correcting it. It will help avoid introducing unwanted artifacts into the footage during the color correction process.
3. What is spatial denoise?
Spatial denoise is an audio processing technique that is used to reduce the amount of background noise in an audio signal. It works by using a spatial filter to identify and remove noise sources that are not located in the same direction as the desired signal.
It can be helpful in situations where there is a lot of background noise, such as in a crowded room or when recording outdoors.

