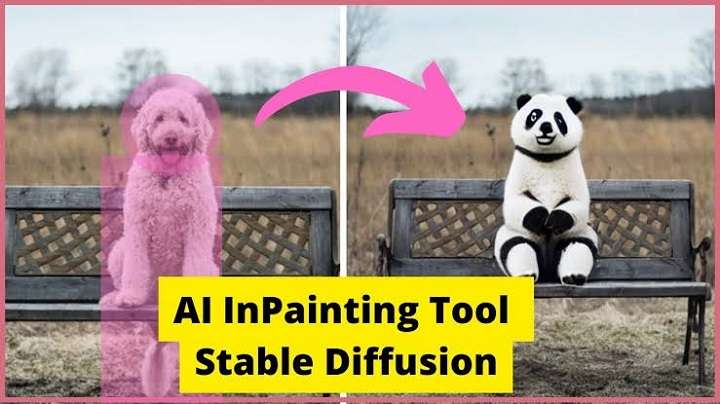
The Stable Diffusion model of inpainting is a technological feature of Stable Diffusion that many users have found handy when filling up damaged areas or missing parts of an image. It is also useful for removing parts of a photo you do not desire to see. Indeed, this technique produces realistic images that appear how the user wants and suit a particular purpose.
If you wish to join the growing community of digital creators who inpaint with Stable Diffusion, this article is for you. In this blog, we will share all you need to know regarding Stable Diffusion inpainting. Furthermore, you will be shown practical ways to use inpainting with the Stable Diffusion model, its different uses in various fields, its unique advantages, and expert tips on how to get the best with Stable Diffusion inpainting.
Part 1. What is Stable Diffusion Inpainting?
Inpainting is a feature that helps you replace parts of a photo with another photo using a text prompt guide. Stable Diffusion has introduced this feature in its tools to give users more editing capacities when bringing their most creative imaginations to life.
The workflow is simple: you provide an original photo, a mask photo that outlines the portion you wish to replace, and a text prompt. Now, the Stable Diffusion model uses the new photo to replace the masked portion with any object or scenario you have described in your text prompt.
That is all!
The Stable Diffusion inpainting tool is useful for creating new images with different subjects from the existing or original images. In addition, it makes it possible to restore old or degraded images by replacing the unappealing parts with more visually appealing objects.
Note that for a powerful AI tech like Stable Diffusion, you must run end-to-end inpainting tests to ensure that the original image, the text prompt, the mask image, and the desired output are all in sync. So, the next section is dedicated to that.
Part 1. How does Stable Diffusion Inpainting Work?
Do you want to know how inpainting with Stable Diffusion works? Then keep reading to learn about the three Stable Diffusion inpainting apps you can easily use for this purpose.
3 Practical Inpainting Apps with Stable Diffusion Model:
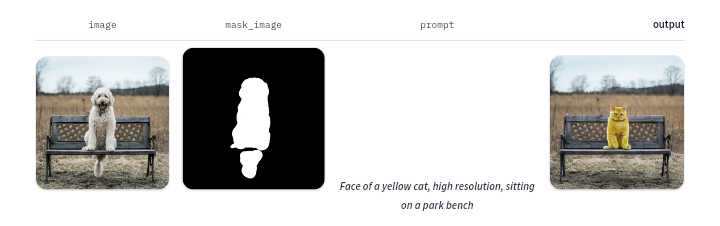
1. Hugging Face Stable Diffusion Multi Inpainting
The first method of Stable Diffusion inpainting is the Hugging Face Multi-Inpainting tool. Follow the guide below to learn how this tool works:
- Visit Hugging Face Stable Diffusion inpainting online.
- Drag and drop the image you wish to edit or click the center canvas to upload your image from your device or computer store.

- Tick the option to brush over the area you want to remove or type the part(s) you want to mask.
- Input your descriptive text prompt to specify what the editor should add in the masked portion. Select “Run” and wait a few seconds for your final result. You can start over if you are dissatisfied or download the new image.
2. Getimg.ai Editor
The second practical inpainting app with the Stable Diffusion model we recommend is the Getimg.ai editor. To use this tool, follow the guideline below:
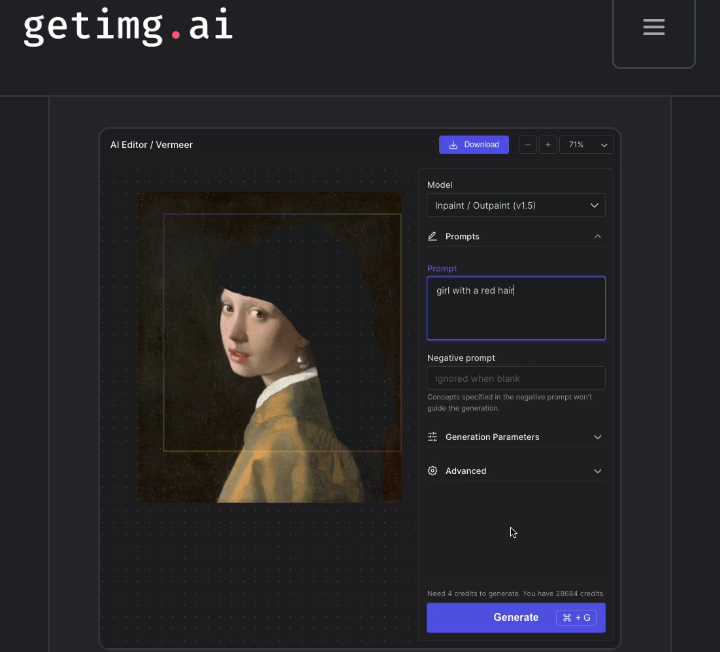
- Log on to the Getimg.ai editor online and click the “+” sign in the middle of the page to add a new image you wish to inpaint onto the blank canvas.

- Click the eraser icon, choose your brush size, and drag the eraser brush over the areas of the photo you want to mask. Ensure that everything you want to replace is completely covered with your eraser.

- To add a new object, select “Inpaint/Outpaint,” then drag the “Generation Frame” to cover the masked part. Next, go to the box under “Prompt” and type what you want to create above the masked area. Now click “Generate.”
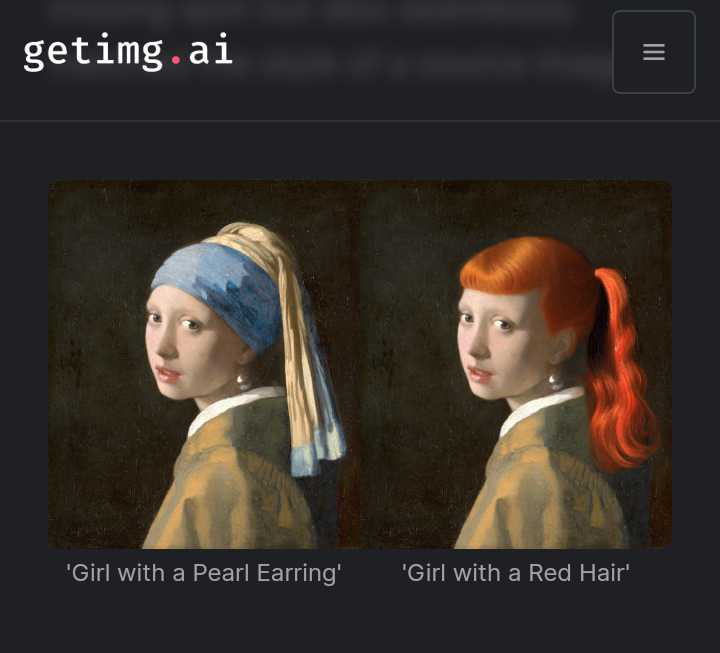
- Based on your prompt, the Stable Diffusion inpainting editor will bring up four variations of new images. Click the right arrow to view each image and select the novel image that appeals the most to you before you “Accept.” In the image below, we have chosen the last variation.
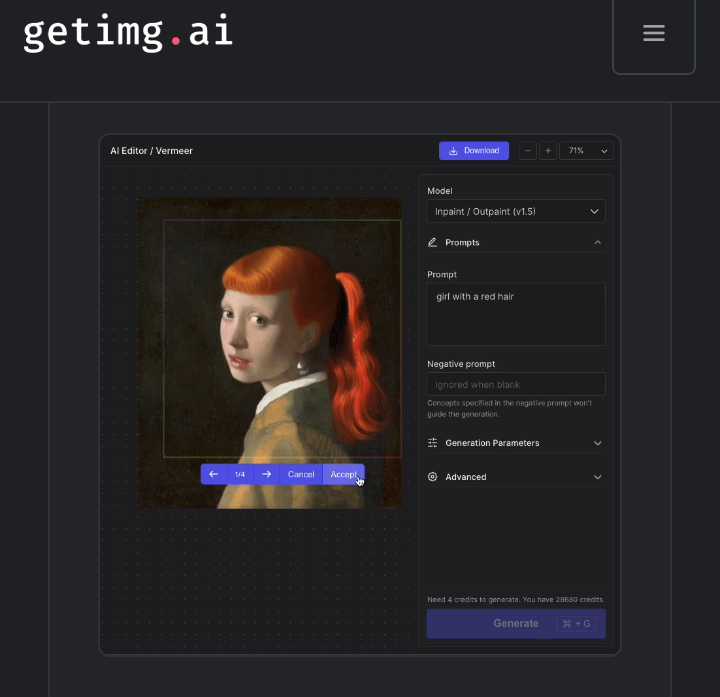
- You can choose to cancel and start all over if you do not like the output. However, you may need to adjust your prompt to help this AI editor focus more on providing the result you want. Here is a before and after of the inpainting process:
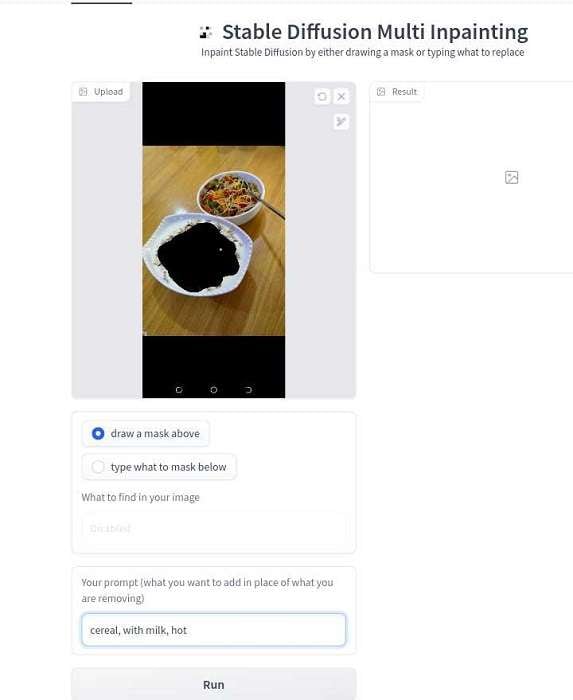
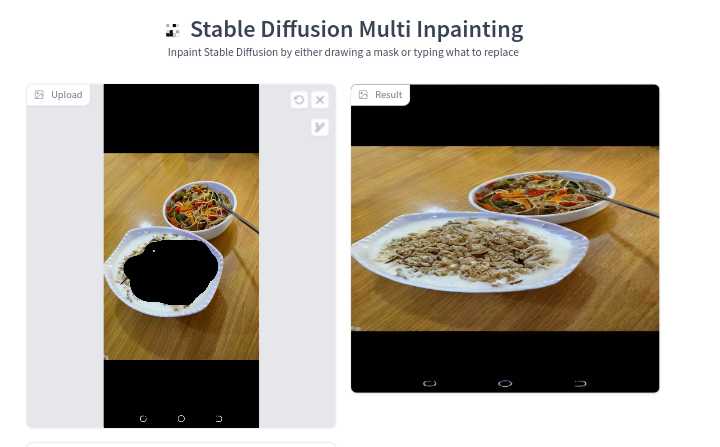
3. Inpainter Vercel App
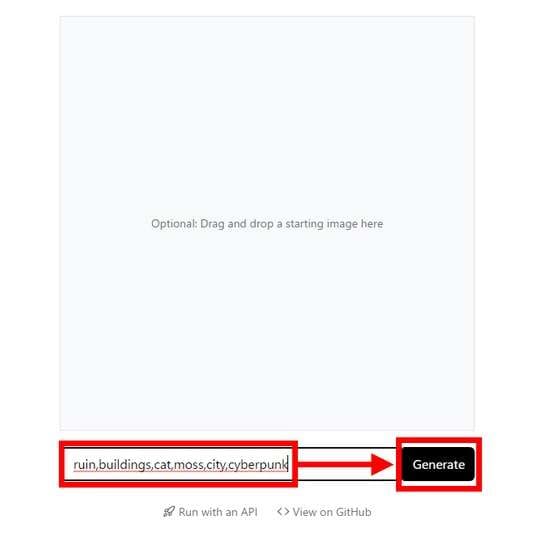
The Inpainter Vercel App uses Replicate Stable Diffusion inpainting online tool to easily replace a part of an image with another one of your choosing. Follow the guide below to use this tool:
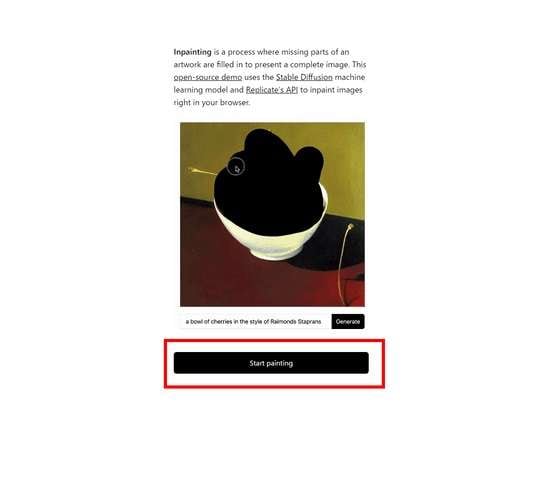
- Visit Replicate Stable Diffusion inpainting online and select the “Start painting” button.
- You will be given two options: drag and drop an image from your device storage or type a descriptive text prompt to start painting from scratch. Click “Generate.”
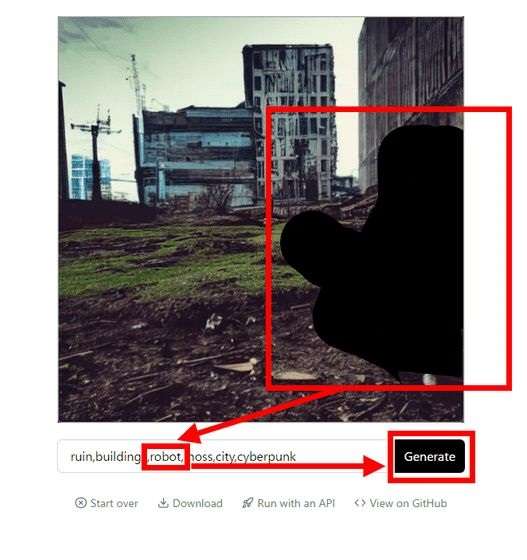
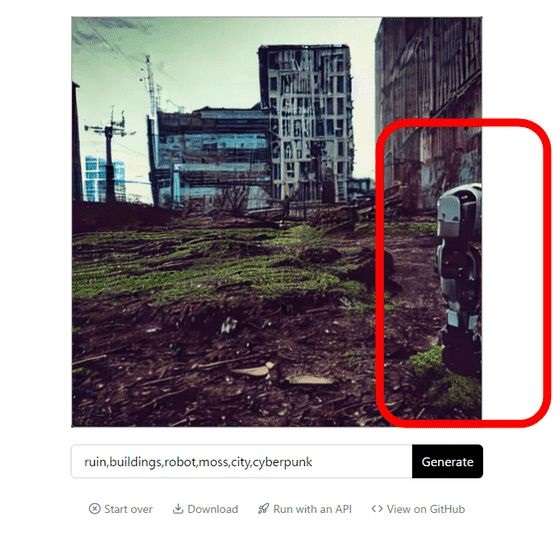
- Wait a few seconds for Inpainter to generate your image if you used a text prompt; then add more prompts if you wish to change it. If not, move on to the next stage.

- Using your computer mouse or phone screen, fill in the subject you wish to replace and type the object you want to place in the filled area. Now, choose to “Generate” again.
Different uses in various fields
Inpainting Stable Diffusion is useful in various fields for various purposes, as outlined below:
- In architecture, it can be used to repair damaged sections or incomplete areas of building designs to give construction crews more precise and complete information to work with.
- In medicine, inpainting is useful for mitigating suboptimal results from MRI imaging patients’ brains. For instance, when a patient’s head is restrained during such a procedure, the imaging may be cropped, leading to data loss and inaccurate diagnosis. That is where inpainting ensures that scans are high-quality and complete.
- In photography, inpainting is used to smoothen or remove blemishes on people’s faces or skin in photos.
- It is also used to restore missing or damaged frames in film restoration.
Pros & Cons of Stable Diffusion Inpainting
Pros:
Some top advantages of using this editor include the following:
- It is vital to restore old photos to their former glory and even more. With inpainting, you can remove scratches, cracks, red eyes, or dust spots from images to make them more appealing.
- The heat equation used here is mathematically stable, meaning it does not cause divergence or instability in redistributing intensity values to an image’s patches that need refilling. That leads to a smooth and natural result.
- It supports rebuilding complex structured images, edges, textures, and sharp transitions with a seamless finish.
- The Stable Diffusion inpainting model generates efficient results faster than most editing techniques.
- It produces high-quality final image resolutions, allowing you to explore different art styles and combinations.
Cons:
Some major limitations and biases of this editor are outlined below:
- Perfect realism cannot be achieved using this model of inpainting.
- Regarding more complex tasks, the Stable Diffusion model of inpainting does not perform as well as expected. Such tasks as patterned or textured surfaces may appear mismatched and unnatural when edited with a Stable Diffusion inpainting tool.
- This inpainting model was built and trained using English captions, making generating images described in other language prompts impossible. And when it does, the results are worse than the English prompts’ images.
- There is the security risk of your AI-generated image falling into the wrong hands since sensitive data are stored in this form.
- It could be misleading since this tool can add and replace whatever aspects of an image you wish in a natural form, which may differ from reality.
Expert Tips:
1. Use high-quality source images to ensure accurate and efficient inpainting results (try Media.io AI Photo Enhancer to get quality source images).
2. Combine Stable Diffusion Inpainting with other AI image processing techniques like Media.io AI object remover (to remove unwanted objects from your photo), photo restorer (to turn old images into new ones), and AI BG remover (to change photo background to anything you want).
3. Optimize your final results by adjusting your Stable Diffusion inpainting parameters.
4. Follow forums and blogs and read research papers to be at par with the latest AI image processing technology updates.