Sometimes, an image is equipped with a blurred object, text, or person. To make an image visually appealing, you need to unblur parts of the image with precision. Nevertheless, it can be problematic for those who don't know how to accomplish this task.
If you also don't know how to unblur part of an image, then you are in the right place. Here you can find the best tools and tips to help you in such situations.
In this article
Part 1: What are the Factors that Lead to Blurry Images
There are uncountable factors that can lead to blurry images. You can find the most common ones below:
- Bad Focus: Focus is the key point to capturing images with great pixels. If you are at the beginner level in photography, you will likely face problems with the focus. Many people use autofocus, but many factors, like moving subjects, can lead to bad-focused images. Moreover, sometimes the object is very close to the camera, leading to poorly focused images.
- Poor Depth of Field: One of the most common problems landscape photographers face is poor depth of field. Most of the time, the background is out of focus, making the image less attractive. So, if you are not focusing on a full object with a maximum depth of field, you are likely to capture blur images.
- Shutter Speed: If your camera's shutter speed is slow, the chances of capturing blurry images are high. The slow shutter speeds let more light capture in the photos, which misinterpret the quality of images. Moreover, shaky hands can also lead to the wrong shutter speed, which results in bad photographs.
- Lens Quality: From good to bad, there is every type of lens in the market. If you use a bad-quality lens, the picture captured with it will also hold some defects. People who just do photography as a hobby mainly have little knowledge of lenses and buy soft lens. It automatically leads to blurred images.
Part 2: How to Unblur Part of a Picture in Photoshop - Offline Method
Adobe Photoshop is one of the popular and tool-fortified platforms to make editing a picture. This tool offers a vast set of photo correction tools that hold the capability to answer the questions like how to unblur part of a picture. With this innovative tool, you can also sync your cloud files and libraries to make images more accessible.
Besides this, it has a slick interface and ultra-fast processing speed, making it a reliable tool. Not only unblur part of the image, but Adobe Photoshop also allows you to remove unwanted objects from a picture. It also helps replace the whole background along with sky replacement. Moreover, you can follow the instruction listed below to blur the specific parts of an image with Photoshop:
Step 1Choose "Sharpen" option
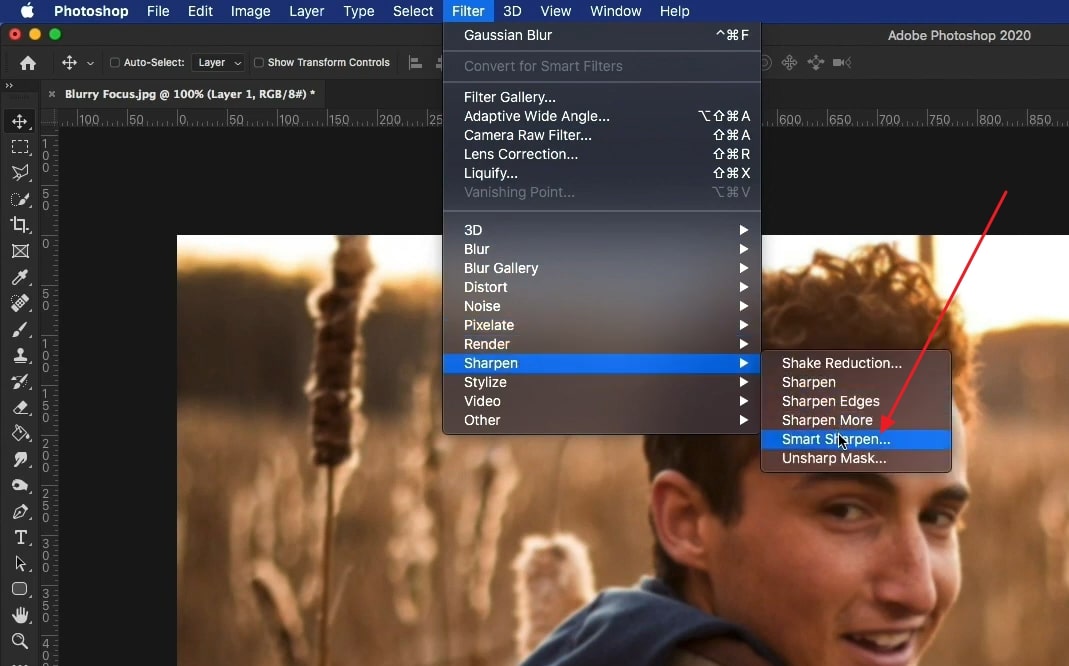
Open Adobe Photoshop on your device and import the image you wish to work on. After this, create a duplicate layer and go to the "Filter" menu. From the enlisted options, select "Convert From Smart Filters." Again, go to the "Filters" tab and choose "Sharpen," and hit "Smart Sharpen."
Step 2Adjust the details
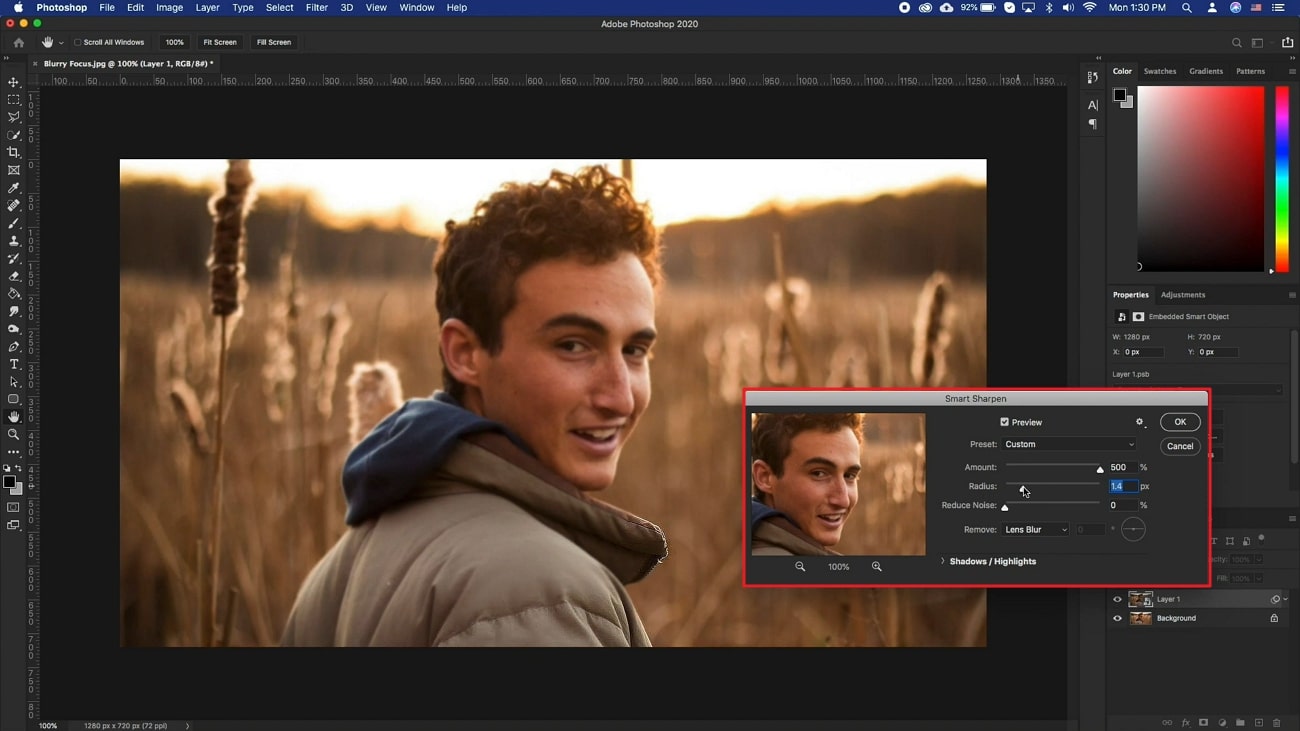
With this, you can customize "Amount," Radius," and "Reduce Noise" with sliders. After making modifications, click "OK" and press "Command/Control + I" to reverse the mask to black.
Step 3Select the area that needs to blur with Brush
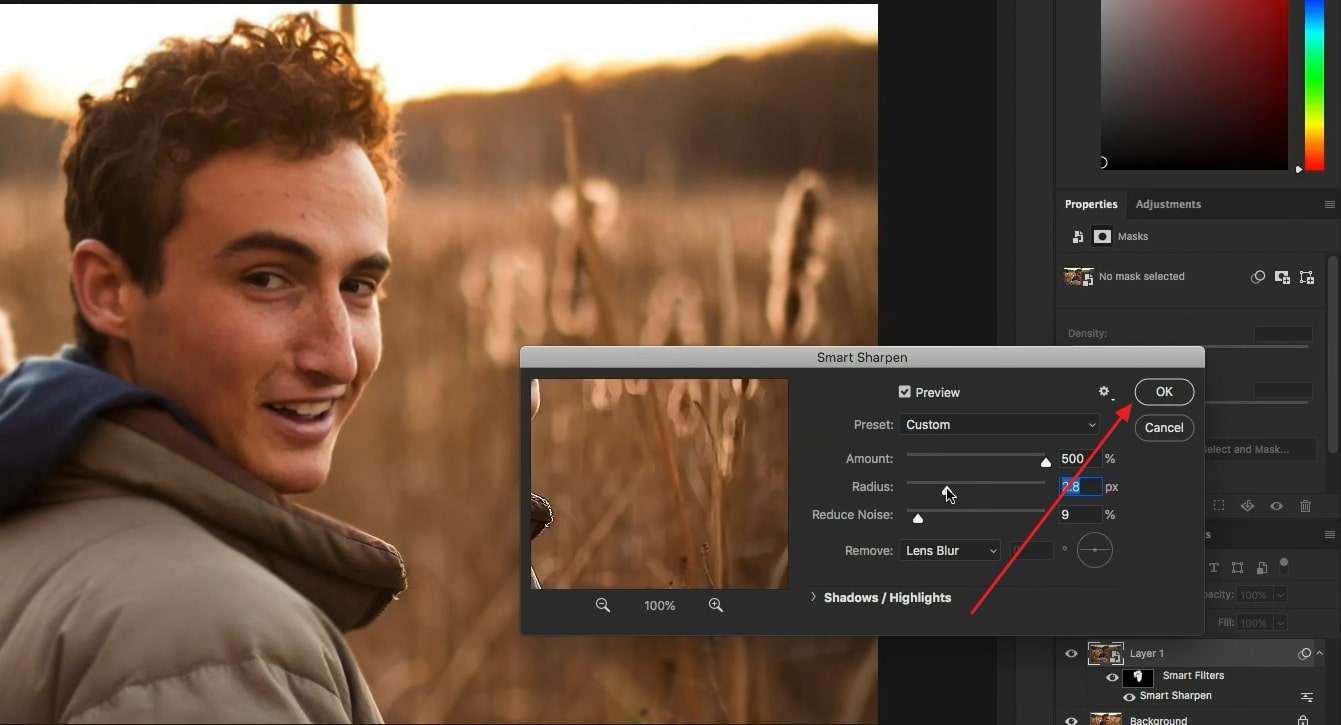
Following this, select "Brush" from the left toolbar and highlight the area that needs to unblur. Again select the "Smart Sharpen" filter and adjust the sharpness as needed. Hereafter click "OK".
Part 3: How to Unblur Image Online with Media.io - AI Image Sharpener
The above section guides you on how to unblur part of a picture in Photoshop, but it can be pretty tricky for beginners. For this reason, you need to use a tool that has a simplified solution. Luckily, Media.io AI Image Sharpener is a perfect tool that can easily unblur images. You can use this tool without mastering any editing skills.
Above all, it is an online tool, so you don't have to compromise the space of your device. It also has a delightful interface along with ultra-fast processing speed, which is a very convenient thing for the users. The below-mentioned steps help you to learn how to unblur part of an image with Media.io - Image Sharpener.
Step 1 Open Media.io - AI Image Sharpener and Add Image
To get started, access "Media.io - Image Sharpener" on your browser and launch it. From the homepage of the tool, click "Unblur Image Now" and select "Upload Image." Following this, add the image that needs to be unblurred.

Step 2 Save the Unblurred Image in the Device
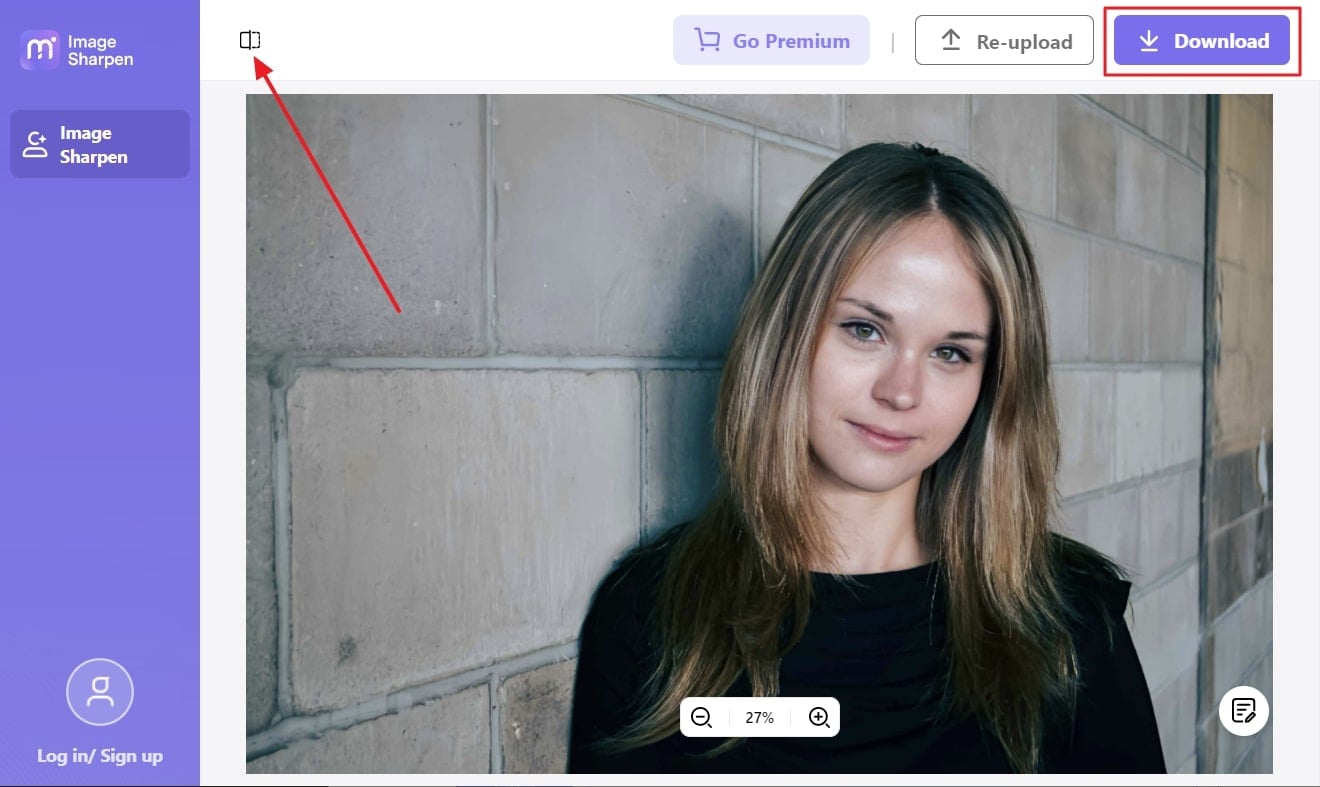
Once the image is uploaded, you will notice that it is perfectly sharp. You can also click on the "Compare" button to compare old and new photos. After this, click on the "Download" button.
Part 4: Tips to Avoid Blurring the Picture in the First Place
Undoubtedly, the image unblur tools can help quickly unblur part of the image. However, it is essential to eliminate the risk of unblurring in the first place. Feel free to follow the tips listed below so you will not face blurriness issues in your image:
- Hand Position: Initially, you need to mind the position of your hands at first. Ensure you master professional hand location and do not shake the camera while photographing.
- Use Autofocus: All camera has autofocused, which is very assistive things. Yet there are many autofocus modes, and you need to ensure you are not using the wrong mode.
- Optimized Shutter Speed: Slow shutter speed means defective and blurred images. For this reason, you need to learn a shutter technique to have perfect shutters even while capturing motioned subjects.
- High-Quality Lens: Lenses cost a lot of money, but when you buy good quality lenses, even at high prices, they will last for a long time. On the other hand, low-quality lenses can be purchased at low prices, but they are prone to capture bad photos. Moreover, they are also not very reliable.

