You are only in trend when you know how to craft trendy videos. That’s what video makers believe nowadays. With the popularity of video making and the booming market of video editing tools like CapCut, video creation is just a piece of cake.
And part of video creation is the video effect you want to use, like the blur effect. Whether you want to cover a sensitive part of your video, make your viewers focus on your subject, or add a mystery to your video, CapCut’s blur effect is a feature that you can utilize in various ways.
This article will walk you through an overview of the CapCut editing software and its popular blur effect.
In this article
Part 1: Overview Of CapCut Video Background Editor
First, Let us get to know more about CapCut and its developer.
What is CapCut?
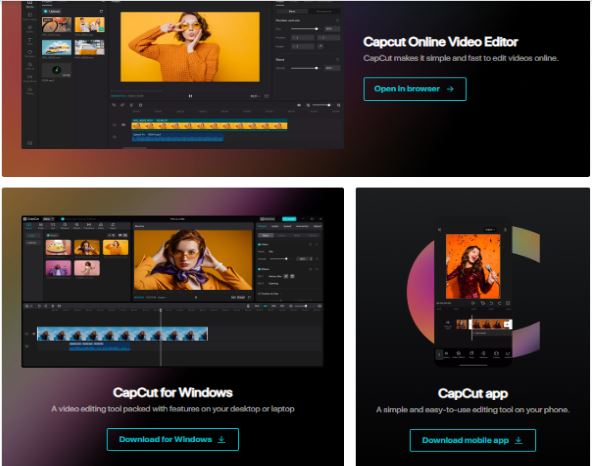
CapCut is a popular video editing software that originated in China. The app’s massive success made it the second-best video player and editor on both Google Play and App Store, accumulating more than 500 million downloads.
Moreover, CapCut is an expert in producing sure-hit social-media-ready videos. The app offers promising features and powerful editing tools and is easily accessible to everyone as it works on the Web, Android, iOS, Windows, and Mac.
Who developed CapCut?

ByteDance, the developer of the immensely popular app Tiktok, launched video editing software in China last 2017 named Jianying. Immediately after its release, the app became so popular that it dominated China's chart of most used apps. Due to this, another company named Shenzhen Lianmeng Technology launched its app version, which was later acquired by ByteDance in 2020 and rebranded as CapCut.
What Are The Key Features Of CapCut?
CapCut assures you that this app is worth the hype. Here are the key features of CapCut you must try:
Split Function
CapCut’s Split function removes unwanted video parts by adding two or more screens in a single frame. Open a video, tap the Split function, and let CapCut precisely split your videos.

Transitions
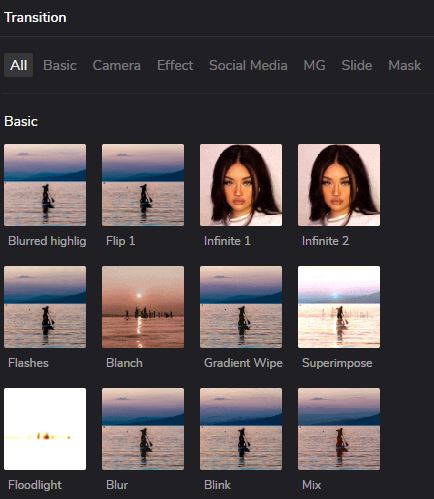
Transitions make your videos more engaging. Select from CapCut’s Basic, Camera, Effect, Social Media, MG, Slide, and Mask transitions.
Background Remover
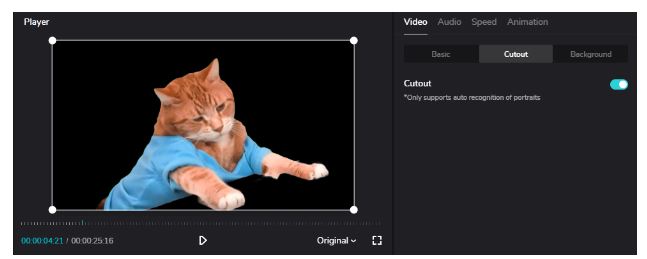
Need more from your video backdrop? Worry no more, as CapCut allows you to instantly cut out your video background and replace it with a more appealing one!
Effects
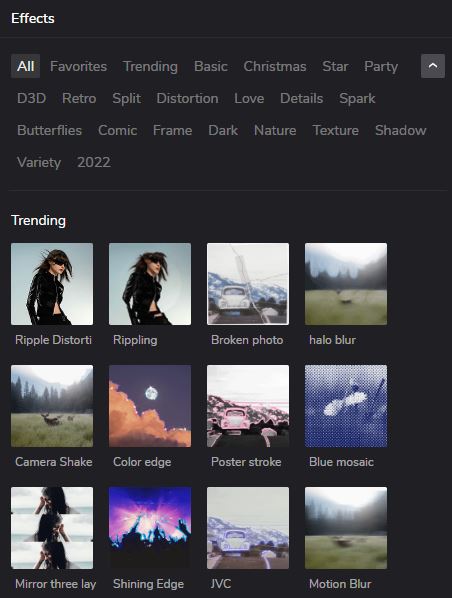
Apply your favorite effects such as 3D, Blur, Retro, Part, and many more with CapCut’s collection of the latest trendy effects.
Animations
Animate your videos with CapCut’s impressive library of animations. Choose from In, Out, or Combo.
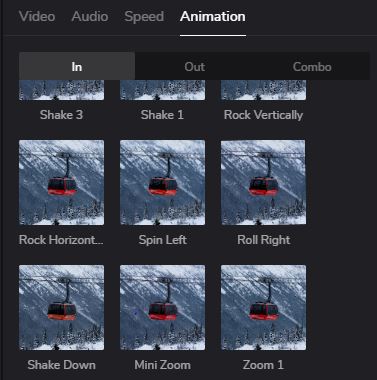
Library of GIFS and Stickers
Want to integrate your favorite GIFs and stickers into your videos? CapCut makes it possible with its GIPHY integration. Just search your favorite GIFs and stickers on the search box inside the library tab!

Part 2: 3 Ways Of Applying Blur Effects In CapCut
Here are the different ways on how to apply the blur effect in CapCut.
Solution 1: Blur an entire video
If you wish to blur your entire video, do these following steps:
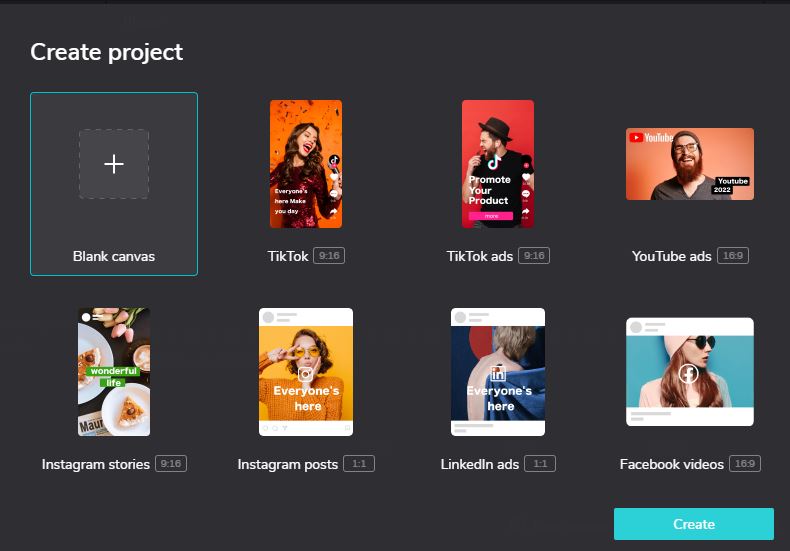
Step 1 Open CapCut and select your preferred video size.
Then, click Create.
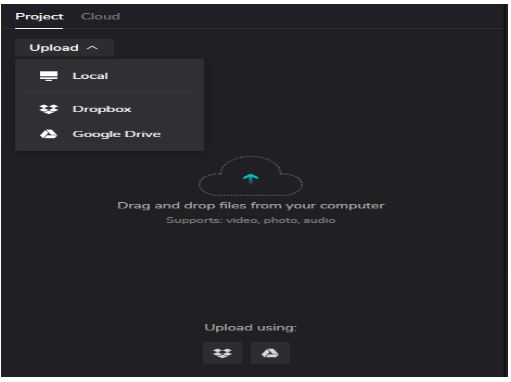
Step 2 Import your video from your local device, Dropbox or Google Drive.
You may also use the Drag and drop option.
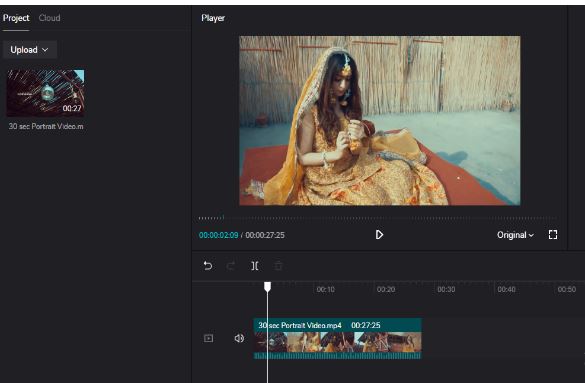
Step 3 Drag and drop your video into the timeline.
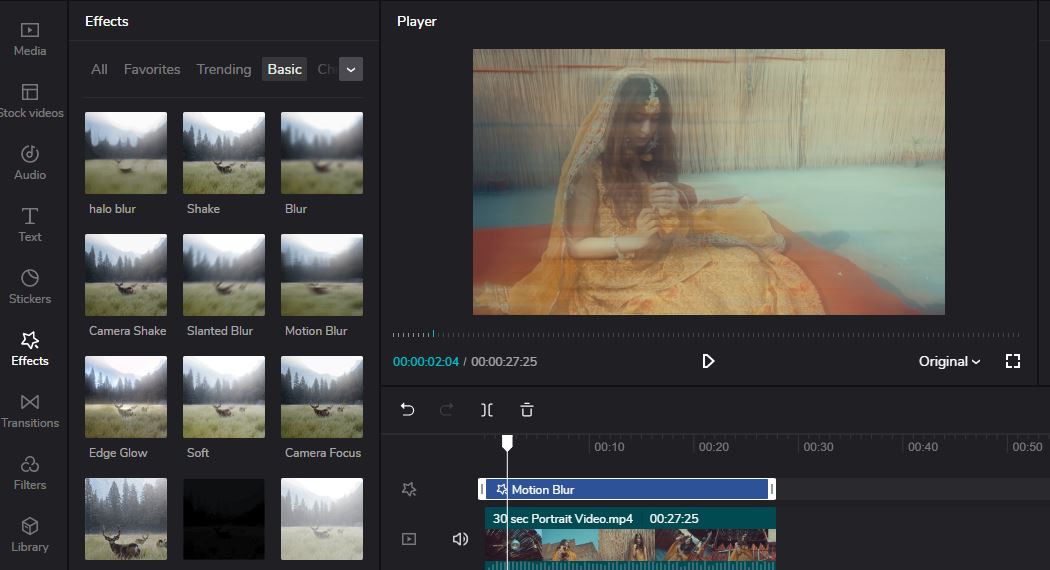
Step 4 Go to Effects.
Then, click Basic>Motion Blur. Drag and drop the effect above your video and adjust the length accordingly.
Solution 2: Blur a part of a video
Suppose you want to blur a part of your video, your face for example, you can try this method.
Step 1 Open CapCut on your PC, upload your file and place it into your timeline.
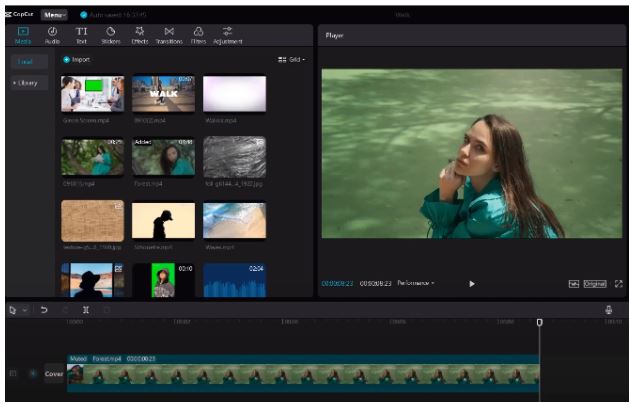
Step 2 Click Effects>Basic>Blur.
Then, drag and drop your chosen blur effect into your timeline and click Export.
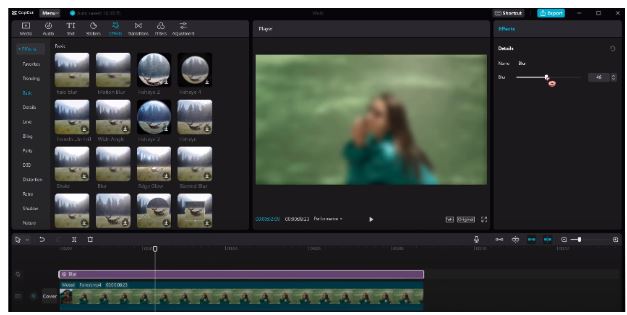
Step 3 Delete the blur effect and place the previously exported file above the original clip.

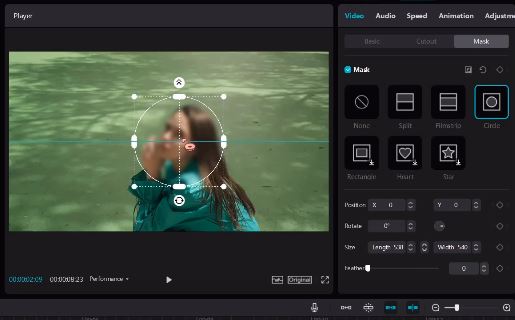
Step 4 Go to Video>Mask and select your preferred mask shape.
Then, place the mask to the part of the video you want to blur.
Solution 3: Blur the video background
The last option you can try is blurring your video background. Here is how you can do it in your PCr:
Step 1 Open CapCut, import your video and place it into your timeline.
Then, click Effects.
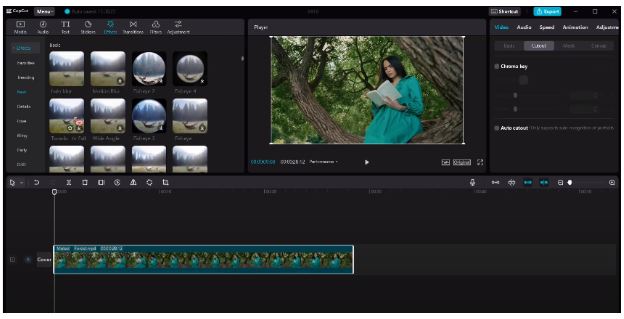
Step 2 Choose the blur effect you like and add it to your timeline before clicking Export.
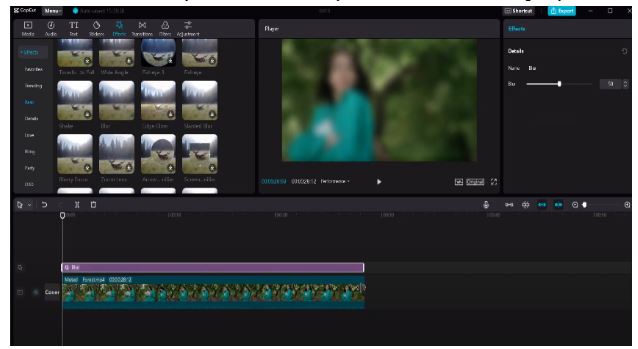
Step 3 Delete the blur effect and add the video you exported below the original video.
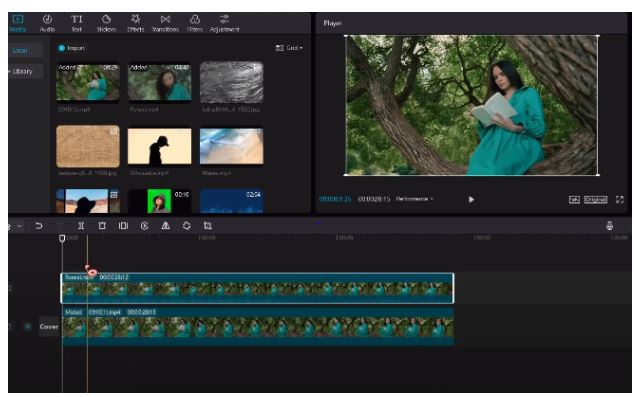
Step 4 Finally, click Video>Auto Cutout.
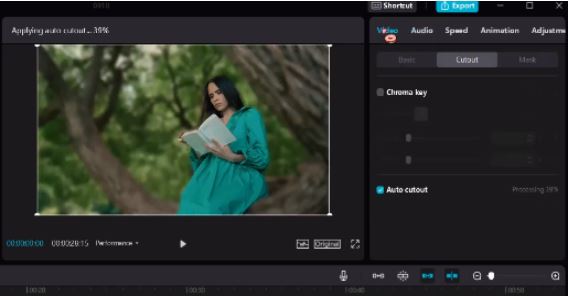
Part 3: Alternatives: Useful Tools For Applying Blur Effect To Your Video
Kapwing
Supporting System: Web
Pricing: Free to start. Kapwing Pro starts at $16 per month.
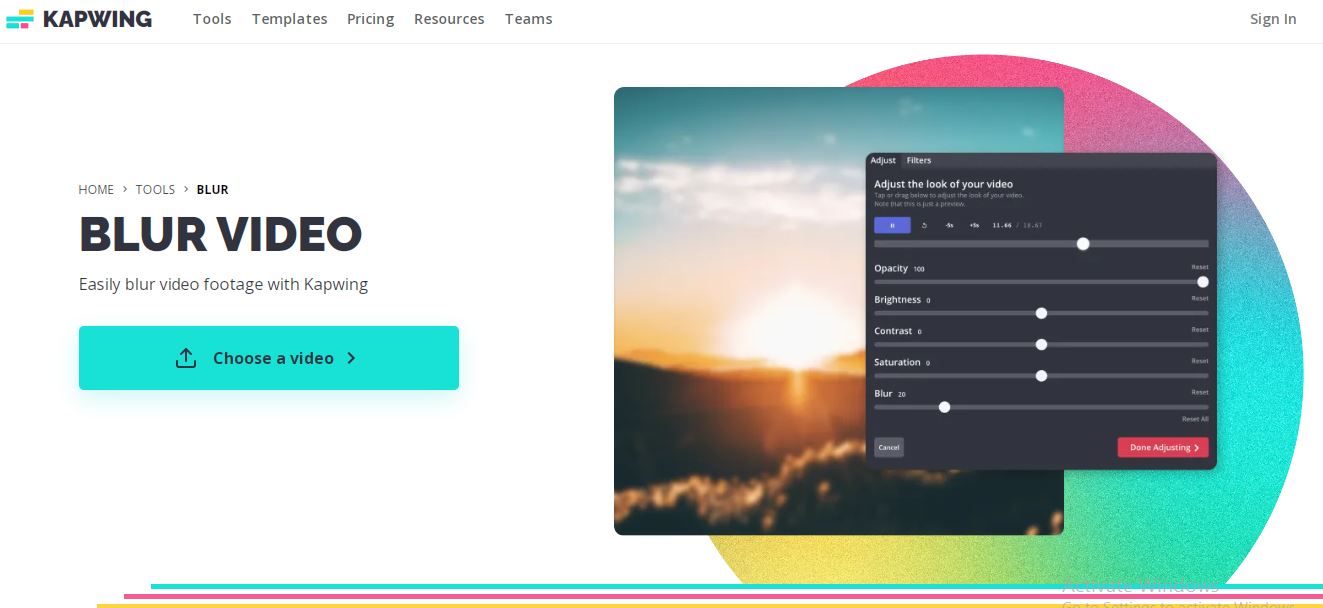
Kapwing is an online video editing software. One of its most popular tools is the video background blur which lets you seamlessly blur your video backgrounds in seconds.
The Kapwing editor’s Blur slider is easy and intuitive to use. It also offers a high level of control over how much you can blur your video. And just like CapCut, Kapwing also allows you to blur entire or specific parts of your video And, since Kapwing is an online software, it does not require any installation and can work on any device.
Kapwing is free to use. However, one thing that’s a bit lacking is its capability to maintain video quality upon exporting. You also need to pay if you want watermark-free videos.
Flixier

Supporting System: Web
Pricing: Free to use. Pro Plan starts at $14 a month.
Unlike Kapwing, Flixier specifically offers a tool for blurring and pixelating a face in a video. This tool is as easy as dragging and dropping a filter mask on your video and adjusting its size and position by dragging on its edges.
Moreover, Flixier allows you to use keyframes in moving and resizing blurred areas to keep your subject anonymous. Another tool Flixier offers is the black bar feature which pixelates people’s identities and hides sensitive data.
Furthermore, Flixier requires you to purchase more codes to enjoy unlimited video editing. For example, in the basic plan, you are limited to exporting videos for 5 hours a month with under 40 GB of storage.
Blur-Video
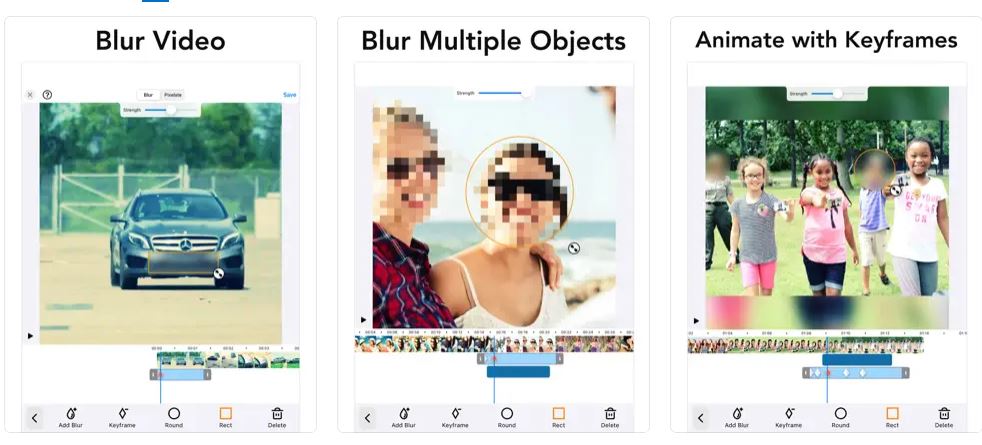
Blur-Video is an app for iOS users who wish to blur pixelating faces or other unwanted objects and areas of a video.
Unlike other apps, Blur-Video lets you blur multiple objects in a video using ellipse or rectangle shapes with an offset so you can easily blur with touch using your finger. You can also define the duration of each blur area and adjust the shape blur intensity and duration.
The only drawback is that navigating the strength bar can be difficult. Still, Blur-Video is a simple and great app to blur parts of your video.

