Did you know that you can easily trim MP3 Macor Windows 10 for free? Well, two common computer operating systems will allow you to do that via the Apple QuickTime and Windows Media Player. However, trimming MP3 professionally entails more than just having the right trimming tools. So today, I want to walk you through some simple methods to trim MP3 Windows 10 and Mac plus a capable online alternative. Let’s dive in!
Part 1. How to Trim MP3 on Mac with QuickTime
Trimming MP3 on Apple QuickTime should be a piece of cake with the right steps. This preinstalled app is pretty straightforward and works smoothly on all Mac OS X versions. So, if you want to cut down an audio using QuickTime, apply these simple steps:
Step 1: After identifying an MP3 audio that you’d like to trim, open it using the QuickTime Player. To open a file, simply drag it to the app or click File > Open File.
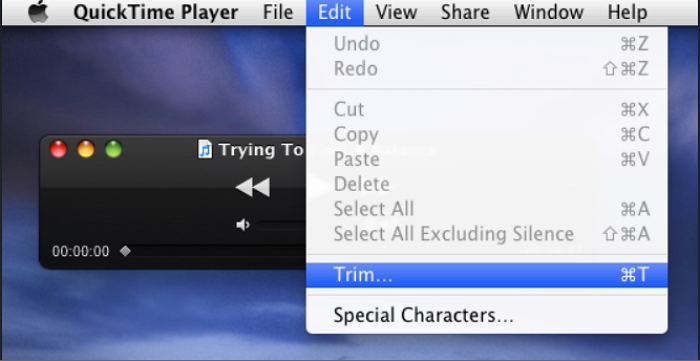
Step 2: Next, click the Edit tab and then choose the Trim option. You can now start cutting by moving the yellow trim sliders. This should help you set the start and end time for your audio.
Step 3: Now press the play button to preview your changes. If it’s okay, tap the yellow Trim button located on the top-right corner.
Step 4: Now drag the trimmer timeline to set the starting point for your MP3 file. You can also trim by entering the start and end time manually.
Step 5: Finally, save your edited MP3 file by clicking File > Export/Save As and then choose an audio format. You can convert MP3 to M4A, AAC, M4R, and more.

Part 2. How to Trim an MP3 in Windows Media Player
Windows PC users can also cut MP3 files for free on the built-in Windows Media Player. All that you need is to install a third-party plugin called SolveigMM WMP Trimmer. It is a lightweight app that will cost you nothing to install. So without any further ado, let’s quickly take a look at how to trim an MP3 in Windows Media Player easily:
Step 1: First of all, download and install SolveigMM WMP Trimmer on your PC before launching the Windows Media Player app.
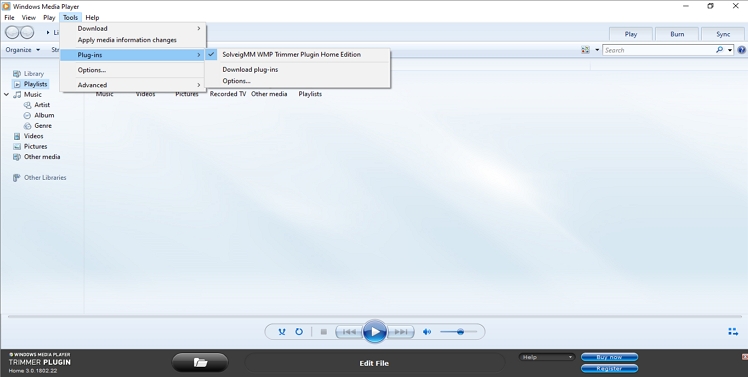
Step 2: Next, on the WMP, click the Windows Media Player, tap Tools > Plug-ins > SolveMM WMP Trimmer Home Edition to activate the trimming function. You’ll see the cutting tool at the bottom of your home window.

Step 3: On the audio trimmer, click the folder icon to open your File Explorer and import an MP3 file. Note, however, that this tool allows the trimming of one file at a time.
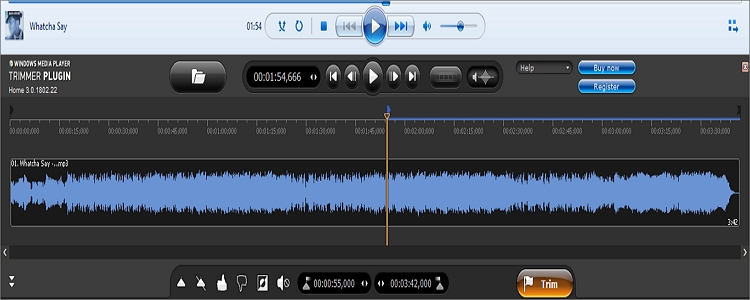
Step 4: Click the Edit File button to start trimming your MP3. To trim, drag the orange slider to a starting point then press the Add marker button. Repeat the same to set an ending point. You can also enter your audio duration manually.

Step 5: Hit the play button to preview audio before tapping the Trim button to cut it. It’s that simple and self-explanatory.

Part 3. Best Audio Trimmer for Mac/Windows
Although the first two methods will ensure high quality results, they have some drawbacks. For instance, they are a bit complicated to use for beginners. Also, some users don’t like installing third-party plugins in their computer as it is the case with WMP. So, to avoid these ugly scenarios, I recommend the Online UniConverter (Originally Media.io). It is straightforward, quick, and available on any device, including iOS and Android. Even better than other online trimming apps, the UniConverter doesn’t feature any ads whatsoever. Just get an updated browser with a reliable internet connection and start editing audio on any device.
Online UniConverter – Best MP3 Trimmer
- Trim MP3 Mac or Windows 10 quickly and with high-quality results.
- Supports all standard audio formats such as AAC, AU, M4A, M4R, MP3, and more.
- Crop MP3 and other audio formats online effortlessly.
- Upload MP3 from local and cloud storage.
- Edit all video and image formats by cropping, cutting, compressing, and more.
- Professional 24/7 customer support.
- Available on all browsers, including Google Chrome, Apple Safari, Edge, Firefox, etc.
Step-by-step process to trim MP3 Windows or Mac with Online UniConverter:
Step 1. Launch the app
On your favorite desktop browser, launch the Online UniConverter. Make sure that your browser is updated for quality results. Also, I recommend the Google Chrome for a smoother process.
Step 2. Upload your MP3
The next step is to click the Add button to upload your MP3 audio. Another alternative way is to simply drag and drop MP3 on the trimmer.
Step 3. Set preferences
Now drag the purple trimming handles at the start and endpoint of the imported MP3 to set the beginning and ending points for the file. Also, you can manually enter the minutes or seconds as well as set the fade effects.
Step 4. Trim MP3
Last but not least, navigate to the Save To button and select an audio format to transcode your MP3 file to. And lastly, tap the Cut button to trim MP3 using Online UniConverter. After the process, click the Download tap to save your audio on either Dropbox or local storage. ts.
Summary
To sum it up, all the mentioned audio trimmers will guarantee you high-quality results. However, both the WMP and QuickTime are dedicated desktop apps. You might also find them tricky to use at first. So, the best solution is to use the online version which is simpler, faster, and offers more editing features.

